Since my first Art History class in high school I’ve been interested in art conservation and am currently preparing for graduate school for art conservation. Among various academic prerequisites, like chemistry and studio art, of which I’ve already completed, graduate programs require many hours of hands-on lab experience. All of the programs are very competitive, and they expect their incoming class to already have an understanding of the methods and philosophies that make the profession.

One of the first major projects I was able to work on was for Indiana University Art Museum conserving two Thomas Hart Benton murals from his cycle showing the cultural and technological history of Indiana. I worked with the IUAM’s paintings conservator, a graduate student from Buffalo, and another undergraduate. We treated the last two murals in the cycle, and it was the first time I really saw a project from start to finish. We documented them, did condition reports, cleaned them, consolidated areas of flaking (there were many), inpainted, and re-varnished.
Earlier this year I got more experience with wall murals when I went to Peru with an art conservation trip through the University of Delaware, which has the only undergraduate art conservation program in the States. We did condition reports for a few monasteries in Arequipa, and were actually able to work on wall murals inside a small adobe church in Orurillo, which is halfway between Arequipa and Cuzco. At that location we cleaned the paintings and did emergency consolidation, although our main focus was on writing condition reports and treatment proposals so the town could apply for grants so professional conservators could come in and really commit to preserving the murals they have.

Another one of the first projects I worked on was for the IUAM preparing Morton C Bradley sculptures for photographs for a book that is soon to be published by the University. There were about 70 sculptures that all just needed to be cleaned, mostly dusted. I also wrote condition reports for some of them.
An ongoing project I worked on for most of last fall was building storage supports for a small group of dance costumes from Africa and Brazil. All of them were being stored in a way that was putting a lot of stress in areas that weren’t built for handling the weight of the costume. It was really a challenge for me because while my previous experience had mostly been with cleaning one thing or another, this was about the structure of the object instead of the appearance. They were also all different, so I had to tackle each one in a unique way. From this photo you can see that they’re hanging in ways that provide support from a few different areas, and the one second from the left is also supported from a stand underneath it.

I am now coming to my most recent experiences, paper conservation. Leading up to this internship I had been spending the most lab time in the Indiana University Library ALF, Auxiliary Library Facility, that houses the preservation and conservation department. I really worked on a wide range of things, basically whatever overflow they had or what needed help getting a head start on. Most of what I did was dry cleaning and mending tears, but I also learned how to line maps, encapsulate, mount vellum, remove stains, wash paper, and other common practices that can be found in similar labs.

This brings me to why it is that I’m here in front of you today. As an effort to continually be spending time in conservation labs, I am always keeping an eye out for opportunities that really allow me to get a new perspective or skill set. I saw the posting for this internship offered by the UVA Library back in April. It was described as an internship to treat a collection of WWI posters in anticipation for the centennial, doing things like humidification, dry cleaning, mending, and adhesive removal. All of these, save for adhesive removal, I had experience doing but not all within a collection. My skills had been built up piece by piece working on a variety of different letters and maps, so the chance to apply these skills, as well as gain new ones, and see how the results build upon one another was really attractive. When I got the call from Eliza that I had been accepted, I was thrilled. Not only to work on such beautiful posters but also to get experience with a new conservator.

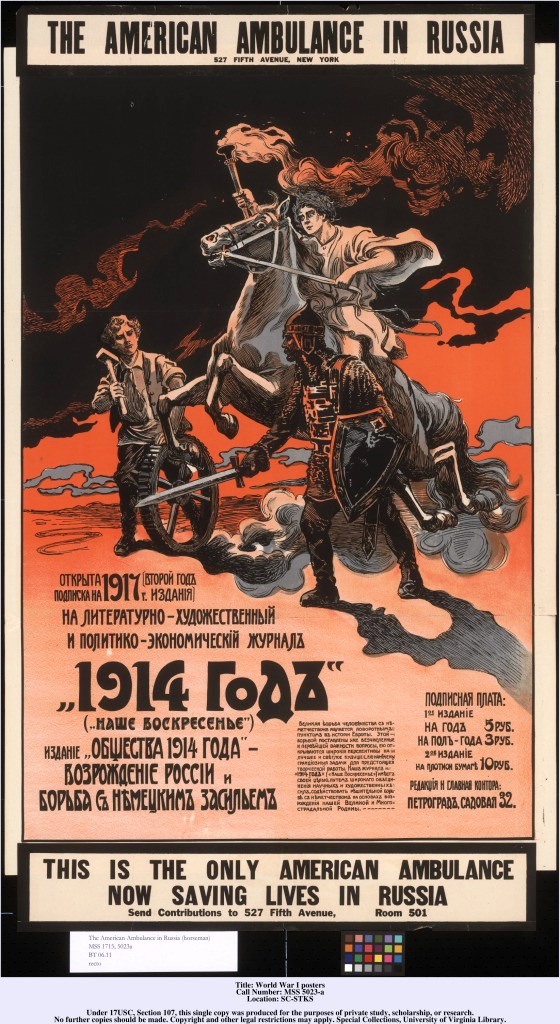
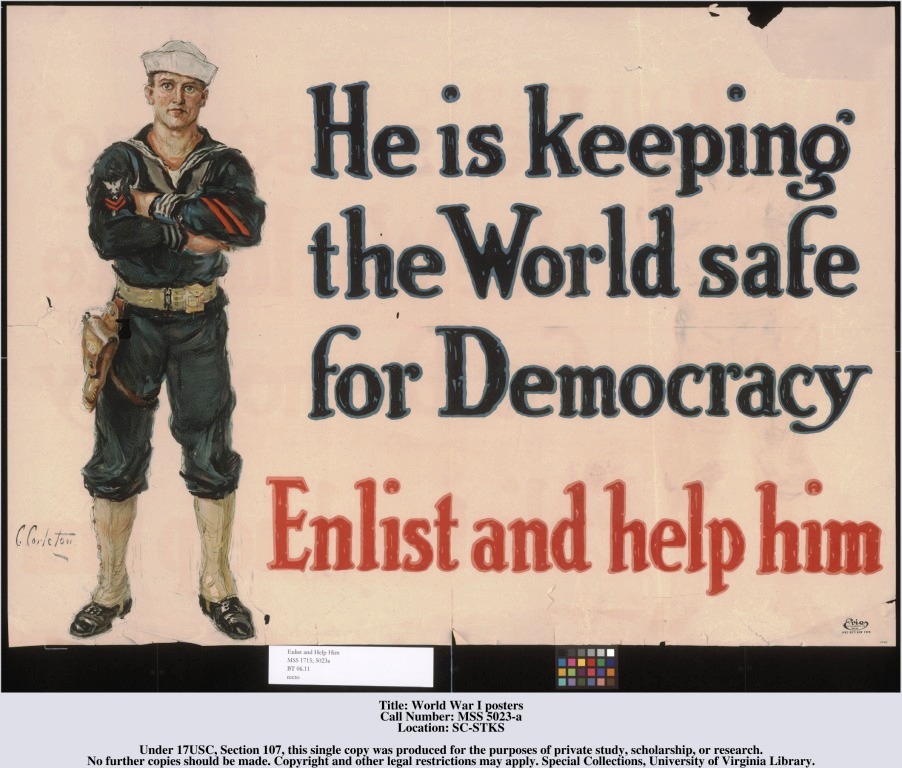
Here are all of the posters. What you might not be able to tell from these small thumbnails is that there is a huge range of sizes. The weight of the paper also varies between each one, and about half are coated paper, which means there’s a layer of clay on the face of the paper that the image is printed on. They did this to make the paper glossier and add weight. This is all fine and good until the coating gets wet, and then it will react independently of the paper – like detaching or staining.


Many of the posters had been stored in a way that caused many folds and creases. Most of them flattened out quite easily by applying a thin line of water right on the ridge of the crease, then letting it dry while under pressure. This is a photo of a rather large one, but many also had full sides that were wrinkled, and those took a bit more time going over everything. Others had been rolled up, so instead of very defined ridges they were more gradual, so those, too, took more time to address. One consideration was for the posters that were coated, I had to be careful that the moisture didn’t affect the clay coating on the front.


Once the posters were flattened to I did dry cleaning. This is a generally gentle treatment, just to get the dirt and grime off. Eraser shavings, a vinyl eraser, or a dry cleaning sponge can all be used and depending on the state of the paper and the level of dirt. For most of these posters I used a dry cleaning sponge because in most cases the dirt came up easily. For areas that were more grimy, the vinyl eraser did a great job of removing the more difficult areas. In the pictures above, the one to the left is before treatment, while the one to the right shows the start of cleaning in the upper right corner of the poster.

The next issue I addressed was to remove any tape or linings that were on posters. Only a handful had tape, and just two had linings. Although none were terribly difficult to remove, the pieces of tape were all in place over bad tears, so care had to be taken to avoid making them worse. You might wonder why we would remove the tape, since it’s protecting a tear, but the the adhesive used for many of these can cause further damage to the poster.
In the bottom left image we see the removal of masking tape. The masking tape that was found on this poster was very old, so the carrier came off without any struggle just by gently sliding a microspatula underneath. The adhesive, however, was still present and by this point had set into a hard layer on top of the paper. This could be removed using acetone. This treatment was a bit tricky, though, because as the acetone softens the adhesive so it can be lifted off, it also allows it to soak through the paper. We tried a couple different ways of applying the acetone and found that the most successful was saturating a cotton swab and wetting the adhesive, then passing back over it a few seconds later to roll it off.

Starting with the photo in the upper left corner (of the previous slide), that is the removal of glassine. Glassine tape is made up of a paper carrier with a water soluble adhesive. This slide shows paper tape, which also uses a water soluble adhesive. This makes its removal pretty low-key. Methyl cellulose is applied, which is a derivative of cellulose, a plant fiber. When mixed with water it creates a gel that allows controlled application of moisture over an area. So, in this case it is handy because it wets the tape without quickly soaking through and saturating the paper underneath. After a short wait, the carrier easily lifted off and another light application to the remaining adhesive allowed the rest to be cleaned off with a cotton swab.


This slide shows lining removal. Two of the posters had been lined with a cotton fabric backing attached with a heat set tissue. This is a pretty dramatic method someone used to protect the posters by making the paper stronger. The cotton fabric came off easily, just peeling off. The tissue, however, was more difficult. It is a paper carrier with heat set adhesive, and initially I began by working a microspatula in to areas that were lightly adhered. This technique worked to an extent – it separated much of the tissue, but was pulling up very thin layers of the paper in some areas along with it. After some time trying to work around areas of stronger adhesion I turned to the hot air pencil. In some cases, tissue like this wouldn’t respond to heat again, but in this case I was lucky. It softened the adhesive enough for themicrospatula to slide easily between the paper and the carrier. In this case, once the carrier was up, the adhesive would cool again and reset, so there was nothing sticky left behind like in the case of scotch tape. Also, the adhesive used here poses no further threat to the paper, so the small amount left behind wasn’t an issue.

The final photo to the bottom right is of lining removal. Two of the posters had been lined with a cotton fabric backing attached with a heat set tissue. This is a pretty dramatic method someone used to protect the posters by making the paper stronger. The cotton fabric came off easily, just peeling off. The tissue, however, was more difficult. It is a paper carrier with heat set adhesive, and initially I began by working amicrospatula in to areas that were lightly adhered. This technique worked to an extent – it separated much of the tissue, but was pulling up very thin layers of the paper in some areas along with it. After some time trying to work around areas of stronger adhesion I turned to the hot air pencil. In some cases, tissue like this wouldn’t respond to heat again, but in this case I was lucky. It softened the adhesive enough for the microspatula to slide easily between the paper and the carrier. In this case, once the carrier was up, the adhesive would cool again and reset, so there was nothing sticky left behind like in the case of scotch tape. Also, the adhesive used here poses no further threat to the paper, so the small amount left behind wasn’t an issue.


Apart from the obvious gains, like improving many of my skills and adding to my repertoire of treatment methods, I have definitely come away with other benefits as well.
 Before I had even finished one poster I realized that my time management skills were in great need of help when it came to conservation treatments. At the beginning of the project I wrote a condition report and treatment proposal for the group, including my estimate of how long each task would take for each poster. Nine times out of ten I was off by at least a couple hours, both overestimating and underestimating the time. This sort of thing is pretty essential to get a grip on, especially if I ever do private work. Individual clients and museums alike all appreciate knowing how long something will take to be completed. At the start, my ability to make this sort of estimate was not very impressive, but as I went along I definitely improved at predicting when I could finish.
Another great benefit of working in a few different places is being in contact with a new set environment. Although I had been in a university library preservation lab before, at UVA the setup is different, the hierarchy of staff is different, and even some of the procedures are different. Especially as a pre-program worker, it’s essential for me to see all of the different areas this career might take me. In between working on the posters, Eliza brought me with her to see what she did when she wasn’t in the lab, from assessing books to be put back in circulation to consulting with the university’s architecture conservator. I was able to get an understanding of what her job consists of, which is different than each of the other conservators I’ve worked under.
Overall, this experience has been incredibly valuable to my professional and academic career, and I can’t express enough how thankful I am that UVA supported this internship position, and I hope that it continues in the future so others like me can gain such fantastic hands on experience and first hand exposure to the field.